

Salesforce Flowsome!
An Easy Flow Guide For Admins
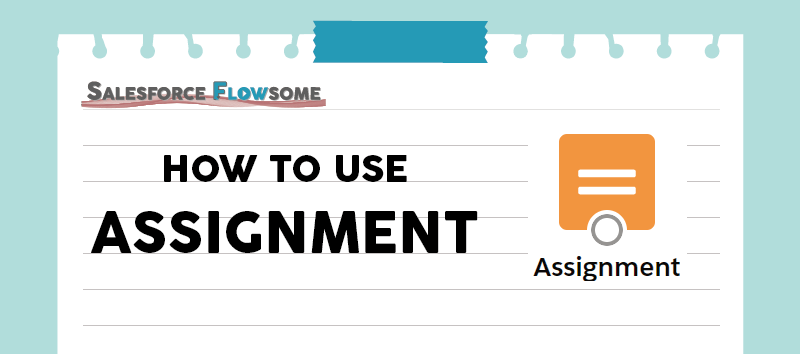
Flow: How To Use “Assignment”

Assignment is the equal sign of flow (As you see in the icon). If you want to change the value of your variables, you will have to do it through Assignments.

Some important notes before we dive into the details of Assignments:
1. Assignment Cannot Update Data Directly
If you have read my introduction of flow , you should know that Assignment is a logic element, so it does not have direct impact of your records. If you want to interact with your records, make sure you use a data element (Get, Create, Update, Delete).
2. Sometimes Assignment Can Be Skipped
Assignment is usually used for more complex operations (ex. in a loop or as a switch). If you simply want to change record fields, an Update Records element should be sufficient.
There are three main fields – Variable, Operator, and Value.
Assignment Fields
| Field | Explanation |
|---|---|
| Variable | Put in the variable that you want to change the value, whether it is an existing resource or you want to create a new one. |
| Operator | How the variable will be modified by the value. The available operators are dependent on your variable type. (See table below) |
| Value | Can be either an existing resource or manually typed in values. |
Assignment Operators
| Operator | Explanation | Available Variable Type |
|---|---|---|
| Equals | Entirely rewrite the variable with the value you assigned. | Text, Picklist, Number, Currency, Date, Date/Time, Collection |
| Add | Add numbers, add days, or add item to collections. For text, the value will be appended at the end of the existing string. (Ex. AB+CD = ABCD) | Text, Picklist, Number, Currency, Date, Collection |
| Substract | Substract numbers or days. | Number, Currency, Date |
| Equals Count | Equals Count = Equals + Count(Value), a count function included in the operator. It counts how many items for only stages or collections. (Ex. Col1 = [A, B, C], Count(Col1) = 3) | Number |
| Add at Start | As opposed to “Add” which add items at the end, “Add at Start” will add from the start of the collection. | Collection |
| Remove All + [Value], Remove First + [Value], Remove After First + [Value], Remove Before First + [Value] | Take these four as a group, and consider the whole formula semantic. (Ex. Col2 = [D, E, F, G] Remove After First “E” = Remove all the items after the first “E” in this collection. NewCol = [D, E]) | Collection |
| Remove Position + [Number] | Each item in a collection has their own position number (index), starting from . (Ex. Col3 = [H, I, J,] Remove Position 2 (I) New Col = [H, J] | Collection |
| Remove Uncommon + [Collections] | Compare two collections and only keep those items that exist in both collections. (Ex. Col4 = [K, L, M, N] Col5 = [K, N, O] NewCol = [K, N]) | Collection |
Check Out How Assignment Can Be Used In Real Cases !
Flow: How To Use In / Not In Operators
Use Case: Connect Files to Multiple Records in Flow

Flow: How To De-duplicate Collection In 3 Ways
Use Case: Use Flow To Auto Close The Spam Case
Official Salesforce Help Article On Assignment
- ← Flow: How To Use Record Id
- Flow: How To Use “Delete Records” →

I am building out a record triggered task flow that uses a formula to update a field on the task. In the formula, I am using some lead record fields and used a get record element. I am trying to then populate that same value from the formula task to the lead. I came across your blog after trying to understand what I was doing wrong, currently I am using an assignment element to try to map the value from the formula to the lead field. Although, it works when I debug it doesn’t actually save the value on the record. Based on “1. Assignment Cannot Update Data Directly” on your blog I learned this is not possible, the introduction of flow link is not working for me, is that information available?

I want to assign a text variable to wo.serviceTerritory.SeriveResource. Can you please suggest me how can I do it with the Assignment component in flow ?Thanks

Hi, so is the field you want to update already exist in the Flow? If so, you can simply find that field and use the Equal operator. If not, you can use Update Records element to find the field and use Equal operator

Just want to say thank you so much Melody for putting these valuable information here, really easy to understand! There’s so much of effort that you’ve put into this blog. I really appreciate that you put the time and effort together to share your knowledge.
- Partner With Venn
- Schedule A Consult
Salesforce Flow Basics Pt. 1: Data Elements, Decision, and Assignment
Written by Jonathan Davis
|
| Jonathan Davis is a Salesforce Consultant at Venn Technology in Grapevine, TX. He enjoys the challenge of mastering all things Salesforce. With , he’s always tackling Salesforce Trailhead to up his integration and configuration skills. |
The goal of this four-part series is to provide foundational knowledge on how to use Flows in Salesforce . Flows are a powerful tool for automating processes in Salesforce and are something that every Salesforce Administrator or Consultant should be familiar with.
At a high level, a flow involves a few basic concepts:
- Elements - The pieces used to build the flow. Each type of element performs a different function.
- Resources - These are created and exist inside a specific flow (as opposed to records that exist in the database) to perform logic and store values when the flow runs.
- Trigger - The event that tells the flow to begin and usually provides the flow with some starting information, such as a Salesforce record.
- Logic - The flow uses logic that you configure in the flow to decide what to do within the flow.
- Result - The flow does one or more actions, such as creating or updating a record in Salesforce, displaying information to a user, sending an email to a customer, or some combination of those actions, and then ends.
Salesforce Flows are declarative, which means they do not require writing code to set them up. This makes them readily accessible to Administrators and Consultants who have not learned how to write code. Salesforce continuously adds features to Flow Builder , so it can do many things that were once impossible without code.
Flows are built with a series of elements connected to one another. When a flow is triggered to run, it works its way through the elements one at a time and performs different logic and actions based on which element is used and the way it is configured.
In this series, we will discuss all of the elements available to work with in the Flow Builder.
Jump to a section:
• Data Elements (Create, Update, Get, and Delete) • Assignment Element • Decision Element • Tips and Tricks
Data Elements (Create, Update, Get, and Delete)
In Flow Builder, there are three groups of elements: Interaction, Logic, and Data .
The Data Elements reach out from the flow instance and interact with Salesforce data, allowing the flow to retrieve information from or make changes to records in the database.
Create Records
The Create Records element allows you to create new records in your Salesforce org’s database. It can be used to create one or multiple records.
When creating one record, the simplest way is to select “Use separate resources, and literal values.” Choose the type of object you want to create a record for, and assign the field values you want the new record to have.
Once the record is created this way, you also can reference the newly created Record ID in other flow elements.
In this example, we created a new Account Record for Venn Technology:

You can also reference a record variable or collection of records used previously in the flow and create a new record using the values that were set previously. This is the only way to create multiple records with one Create Records element.
Update Records
The Update Records element is very similar to the Create Records element, except that it makes changes to existing records instead of creating new ones.
It is also similar to the Get Records element in that you are able to filter for the records you want to update when you use the “Use separate resources, and literal values” option. When filtering records this way, be aware that the Update element will revise all records in the database that meet the criteria, so it’s a good idea to be as specific as possible with your filters.
Alternatively, you can select “Use the IDs and all fields from a record or record collection” to update a record that was previously stored in the flow, such as one from a Get Records element. In this case, to make changes to the values on that record, you should have done so previously in the flow using the Assignment element.

In this example, we use the Update Records element to update the MailingState field of all contacts in the system that have an AccountID field value of “0014T000008zal9QAA.” If we only wanted to update a single contact, we would need to add more filters, such as the Contact ID, or FirstName and LastName fields.

Get Records
The Get Records element is used to “get” one or more records from the database based on filter criteria set in the component. Getting a record stores its values within the flow, as well as the values of records it looks up to (such as a Contact record looking up to an Account record in its AccountID field), allowing you to reference it in other flow elements and resources.
The filter criteria is based on values found on the specific record you’re getting, such as the ID or name of an account. Multiple criteria can be used, and the condition requirements can be set using “and,” “or,” or custom logic. When getting your criteria, the filter logic should be as specific as possible (such as an ID value), so that you only get the records you want to work with.
Get Records can be set to retrieve either the first record that meets the criteria, or all of the records that meet the criteria. Multiple records are stored together in a collection.
In the example below, this Get Record is retrieving the first account with a value of “Venn Technology” in the Name field and storing it for use in the flow.

Delete Records
The Delete Records element is used to delete records from the database. Similar to the Update Records element, you can either delete records stored in variables defined earlier in the flow, or specify the object and filter criteria needed to find the records you wish to delete. Similar to the Update Records element, the Delete Records element will delete all records that meet the filter criteria—make sure to be specific.
In this example, we use the Delete Records element to delete an account with the Id of “0014T000008zal9QAA.” By using the Id field in the filter, we ensure that only this specific account record is deleted.

Assignment Element
The Assignment element is one of the Logic elements, which means that it does not directly affect the contents of the Salesforce database. Instead, it is used to interact with records and resources within the flow by changing, adding, or subtracting the values of variables and fields. This is very useful for setting or changing record values before creating or updating them, and for using variables to perform logical functions.
Below, we use the Assignment element to change the StageName field of an opportunity to Closed Won and set the CloseDate field to today’s date with {!$Flow.CurrentDate}. This does not update the Account field in the database yet, but does set the values in preparation for the Data elements.

Decision Element
The Decision element is one of the most important elements in the Flow Builder, as it allows for the creation of multiple paths based on various criteria, allowing a single flow to output different results based on decision criteria.
When creating a Decision element, set the name and criteria for one or more outcomes. If the criteria is met in the flow, then the flow will follow the path for that outcome. If none of the criteria for the created outcomes are met, the “Default Outcome” is followed.
In this example, we create a Decision element that checks if the Opportunity record’s StageName field value is Closed Won.

If the Opportunity is Closed Won, the flow follows the “Yes, Opportunity is Closed Won” path to Create Contract. If the Opportunity is not Closed Won, the flow follows the Default Outcome and sends an email to the sales representative.

Tips and Tricks
Now that you know how to use the Data, Assignment, and Decision elements, here are some tips and tricks when using them.

Using a Decision after a Get Element
The Get Records element will not error out if it does not find anything with the filter criteria provided, but if later elements in the flow attempt to reference the record when there is not one, those elements may cause an error.
For this reason, unless you can ensure that your Get Records elements will find a record, it is a good idea to create a Decision element after your Get Records element to see if it found anything. Do this by checking if the variable from the Get Records element is not null, as shown below.

If the variable is null then the record was not found—the default path is followed and the flow ends. If records are found, the flow continues.
In this example, the flow checks for Opportunity Products, updates them if the flow finds any, and if none are found, the flow ends:

There may also be times when the requirements of your automation may change depending on if there is an existing record or not and, in those cases, you may want to check if the record is present. If the record is not present, check to see if there is an existing contract for an account. Update the contract if there is one and, if there isn’t, choose “Create Contract” instead.

Using Decision results later in the flow
The outcome of a Decision element is stored in the flow as a boolean (true/false) value that can be referenced later on in the flow by other decisions or formula resources.
This can be useful in various situations where a decision was made previously in the flow that you want to reference later.
Below you can see:
• The first decision checks the size of the account • The second decision determines if a new contract is needed • The third decision checks if a new contract was just created for a large account, thereby sending an email to a Sales Representative if it was

For more information on Salesforce Flows, check out our next blog post: Flow Element Basics Pt. 2 – Variables, Collections, and Formulas.

About the Author
Jonathan davis, subscribe for updates, filter by tags.
- Life at Venn
- Integration
- Sage Intacct
- Artificial Intelligence
FEATURED BLOG POSTS
About 20 mins
Learning Objectives
The power of change, the assignment element, build a flow with assignment elements.
- Challenge +100 points
Set and Change Variable Values
After completing this unit, you’ll be able to:
- Change the value of a flow variable.
- Use a variable to accept data from multiple sources.
- Create multiple paths with individual Assignment elements.
This badge is one stop along the way to Flow Builder proficiency. From start to finish, the Build Flows with Flow Builder trail guides you through learning all about Flow Builder. Follow this recommended sequence of badges to build strong process automation skills and become a Flow Builder expert.
Every time you store data in a flow, it’s practically perfect and never ever needs to be changed in any way, right? No, that’s pretty rare. Often, you retrieve record data in a flow, add to it, delete from it, or change it in other ways, and then send it back to the record it came from.
Pyroclastic’s Marketing and Enablement teams want to start using the shipping address for communications. Many accounts have the required billing address but no shipping address. Flo asks you to create a flow that asks users if they want to copy the billing address or enter a shipping address manually, and then updates the shipping address fields accordingly.

It could be a simple record-triggered flow with a single Update Records element, but there’s a hitch. Remember when you updated case priority by setting the value of the Priority field? You had just one value for the Priority field.

In the shipping address scenario, the shipping address could come from the billing address or it could come from user input. Theoretically, the Update Records element would look like this:

That won’t work. The Value field requires a single data source. It can’t use either the billing address or user input; it must be one or the other.
Instead, you need an intermediate holding place—a variable—that can accept a shipping address from either the billing address or user input.

And you need a way to determine whether the user chose to copy the billing address or manually enter an address, and act accordingly. You can use a Decision element for that.
Then you can configure the Update Records element to set the Shipping Address values from the variable . But how do you set the value of the variable?
That’s where the Assignment element comes in. The Assignment element assigns the user’s desired address to the variable, so that the variable value can be used to update the Shipping Address fields.
To assign a value to a variable, you use the Assignment element. In the shipping address scenario, you change the value of a variable to update one field in one record, but the Assignment element can do much more.
A variable is like a lunchbox. While a lunchbox can store a variety of foods, a variable can store a variety of values.

To set the value of a variable, you assign a value to it. For example: Priority equals Sev 0.
In the Assignment element, you set the value of a variable by specifying the variable and its value. Each assignment statement also includes an operator, which controls how the variable is updated. Consider this example.

In this example, the Equals operator replaces the variable’s current value with the specified value. As a result, the Priority variable stores Sev 0 as its value.
In many elements (including the Assignment element), the Value field allows you to enter your own text, select existing resources in the flow, or mix the two together. For example, if you enter The color is {!colorFormula} in the Value field, and colorFormula is a formula that returns a value of “ red ”, the variable receives the value “ The color is red ”.
Looking back at the shipping address flow that Flo requested, let’s build a screen flow that Flo can embed on the Account Lightning page and hide if the Shipping Address fields are filled in.
You might not have learned about screen flows yet. For this example, we keep the screen simple, but if you want to know more, check out the Screen Flows badge.
Start by using what you learned in this badge and the Data and Actions in Flows badge to create a screen flow.
Create a Screen Flow and a Text Variable
- Create a flow and select the Screen Flow type.
- Create a text variable to receive the current record’s ID:
- API Name: recordId
- Data Type: Text
- Available for input: checked
In this exercise, we name the variable recordId for a specific reason. When a user runs a flow from an action button, Salesforce automatically looks for a variable in that flow called recordId and, if it finds one, gives the current record's ID to that variable. This special setup allows flows running from an action button to know which record the user is looking at when they click the button.
We aren't creating the action button in this exercise, but feel free to create one at the end. Check out the Add a Flow as an Action on a Record unit of the Screen Flow Distribution badge for more information.
Create Get Records, Screen, and Decision Elements
- Add a Get Records element to retrieve the current record’s details and store them in a record variable.
- Label: Get Account Data
- Object: Account
- Filter Condition Requirement: Id, Equals , recordId
- How Many Records to Store: Only the first record
- How to Store Record Data: Automatically store all fields
- Add a Screen element that prompts the user to copy the billing address or enter a shipping address.

- Select Screen .
- For Label, enter Enter Address .
- From the Components panel, drag a Checkbox to the screen canvas.
- For Label, enter Use the billing address for the shipping address .
- For API Name, shorten the default name to Use_the_billing_address .
- Drag an Address component to the screen canvas below the checkbox.
- For API Name, enter ScreenShipping .

- Click Done .
- Add a Decision element to create different paths based on the user’s choice.
- Label: Use Billing Address?
- Outcome 1 Label: Selected
- Outcome 1 Condition Requirement: Enter Address > Use_the_Billing_Address , Equals , and True
- Default Outcome Label: Not Selected

- Save the flow. For Flow Label, enter Set Shipping Address .
Your flow should look like this:

Now you have a screen flow that allows the user to either copy the billing address or enter it manually. From whichever source the user chose, you need to copy the shipping address to the Get_Account_Data record variable.
- If the user chose to use the billing address , the flow assigns the values from the record variable’s billing address fields to its shipping address fields.
- If the user chose to enter the shipping address manually, the flow assigns the values entered into the Enter Address screen to the record variable’s shipping address fields.
Next, you update the data in the Get Account Data element’s record variable (Account from Get_Account_Data). You’ll create two Assignment elements to set field values in that record variable: one to copy the billing address (in the Selected path), and one to copy data from the Enter Address screen element (in the Not Selected path).
Add an Assignment Element to the Selected Path

- Scroll to the Logic section and select Assignment .
- For Label, enter Copy Billing Address .
- For Variable, select Account from Get_Account_Data and then select ShippingCity .
- For Value, select Account from Get_Account_Data and then select BillingCity .
- Click +Add Assignment four times, so you have a total of five rows. You have to set each Address field individually, so you need one assignment row for each of the five address fields.
- Select these values in the added assignment rows:
- Account from Get_Account_Data > ShippingCountry equals Account from Get_Account_Data > BillingCountry
- Account from Get_Account_Data > ShippingPostalCode equals Account from Get_Account_Data > BillingPostalCode
- Account from Get_Account_Data > ShippingState equals Account from Get_Account_Data > BillingState
- Account from Get_Account_Data > ShippingStreet equals Account from Get_Account_Data > BillingStreet
When an element has multiple rows, its assignments are performed in order.

- Save the flow.
Add an Assignment Element to the Not Selected Path

- For Label, enter Set Address from Screen .
- Click +Add Assignment four times, so you have a total of five rows.
- Select these values in the assignment rows:
- Account from Get_Account_Data > ShippingCity equals ScreenShipping > city
- Account from Get_Account_Data > ShippingCountry equals ScreenShipping > country
- Account from Get_Account_Data > ShippingPostalCode equals ScreenShipping > postalCode
- Account from Get_Account_Data > ShippingState equals ScreenShipping > province
- Account from Get_Account_Data > ShippingStreet equals ScreenShipping > street

Now the flow assigns values to the record variable’s shipping address fields. But you still need to get that shipping address back into the account record. The Assignment element doesn’t actually save the new values to the record. You need an Update Records element to do that. Create an Update Records element after the Selected and Not Selected paths merge back into one path.
Update the Account Record
- After the two Assignment elements on the flow canvas, add an Update Records element.
- For Label, enter Update Account .
- For How to Find Records to Update and Set Their Values, keep Use the IDs and all field values from a record or record collection . On the Update Records element, this setting updates the record from a record variable. The element uses the record variable’s ID field to determine which record to update, and updates that record’s fields to match the variable’s fields.
- For Record or Record Collection, select Account from Get Account Data .
That’s it! You built a flow that uses five types of elements.
- The Get Records element ( Get Account Data ) gets the current account record’s field values.
- The Screen element ( Enter Address ) prompts the user to either enter a shipping address or copy the billing address.
- The Decision element ( Use Billing Address? ) determines what the user chose and creates a path for each possibility.
- The two Assignment elements make changes to the shipping address fields in the Get Account Data record variable, either copying the billing address to the shipping address ( Copy Billing Address ) or copying the manually entered information to the shipping address ( Set Address from Screen ).
- And finally, the Update Records element ( Update Account ) commits the changed values in the record variable back to the current account record.

You may be wondering what else Assignment elements can do. Well, read on.
- Trailhead : Flow Basics (Learn About Flow Variables)
- Documentation : Flow Element: Assignment
- Get personalized recommendations for your career goals
- Practice your skills with hands-on challenges and quizzes
- Track and share your progress with employers
- Connect to mentorship and career opportunities

Flow Element: Assignment
An Assignment is a Flow element that allows you to set the value of a selected resource.
Official Docs
- Flow Assignment Element
- Operators in Flow Assignment Elements
- Add Logic to Your Flow
Additional Resources
- How to use an Assignment (David Litton)
- Salesforce Flow Assignments (Jordan Nelson)
- Video: Wizard’s Apprentice Visual Workflow Episode 5: Loops, Assignments, and Fast Elements (Brian Kwong)
- Video: Salesforce Flows Assignments (Jordan Nelson)
- About this wiki
- Create a Next Best Action Employee App – Part 2 June 30, 2020 - 3:20 pm
- Create A Next Best Action Employee App- Part 1 June 30, 2020 - 3:19 pm
- Adding Lightning Web Components to Flow Screens October 21, 2019 - 7:45 am
- The Top 10 Things You Want to Know About the New Flow B... February 11, 2019 - 5:36 pm
- Salesforce Einstein Next Best Action “Getting Started”... February 3, 2019 - 2:34 am
- Send Rich Email (Send HTML Email Action) September 12, 2019 - 4:15 pm
- Quick Choice – Improved Picklists and Radio Buttons... December 25, 2019 - 12:57 pm
- Collection Processors for Flow (Sort, Filter, Find, Join,... December 17, 2019 - 12:18 am
- Send Richer Email with the ‘Send Better Email’... August 11, 2020 - 10:23 am
- Updates to Flow Flex Cards June 20, 2024 - 11:20 am
- From Tim Schug – Barcode Scanning Now Supports R... June 16, 2024 - 3:32 pm
- […] Enable Self-Scheduling with Field Service [&#... June 23, 2024 - 12:24 pm by Enable Self-Scheduling with Field Service – TheFieldPress
- […] Create Batches of Appointments with Service Appointment... June 23, 2024 - 12:23 pm by Create Batches of Appointments with Service Appointment Generator – TheFieldPress
- […] Use Salesforce Scheduler and Visual Remote Assistant... June 23, 2024 - 12:21 pm by Use Salesforce Scheduler and Visual Remote Assistant to Provide Virtual Meetings – TheFieldPress
- […] Use Flow with Salesforce ‘Pay Now’ to Collect... June 23, 2024 - 12:19 pm by Use Flow with Salesforce ‘Pay Now’ to Collect Payments Anywhere on Salesforce – TheFieldPress

SFDC Madhukar

Learn Loop Element in Flow | Decision | Assignment | Get Records | Create Records | Update Records
- By Ashish Madhukar
- December 31, 2023
Let’s explore and understand how to use some key Flow elements—Loop, Decision, Assignment, Get Records, Create Records, and Update Records.
The Loop element in Salesforce Flow allows you to iterate over a collection of records or execute a set of actions repeatedly until a certain condition is met.
The Decision element lets you create branching logic based on conditions. It’s crucial for directing the flow of your process.
The Assignment element in Salesforce Flow is used to assign values to variables or fields. It’s handy for manipulating data within the flow.
Get Records
The Get Records element is used to retrieve records based on specified criteria.
Create Records
The Create Records element allows you to generate new records in Salesforce within a flow.
Update Records
The Update Records element is used to modify existing records in Salesforce.
Youtube Link:
SUBSCRIBE OUR YOUTUBE CHANNEL
We provide all types of salesforce videos on this channel. Admin, Developer, Architect, and New Release Facts, Subscribe to our channel to stay up to date on everything Salesforce.
Similar Posts

Platform Workspace API in LWC

Navigate to a URL-Addressable in LWC

Tree grid in Lighting Web Component
Leave a reply cancel reply.
Your email address will not be published. Required fields are marked *
Save my name, email, and website in this browser for the next time I comment.

BRDPro Consulting
Salesforce Registered Consulting Partner

Update or Assignment Element in Before Save Record-Triggered Salesforce Flows?
You can now use update elements in Record-Triggered flows to update the field values that triggered the flow regardless of whether that flow is set to run before-save or after-save.
Before Summer ’21, you had to use the assignment element to update these field values in a before-save situation. And this was very confusing for new flow developers learning record-triggered flows.
Here is how you would do your flow before Summer ’21:

Your assignment element would look like this:

After Summer ’21 you can use an update element. You can still use an assignment element, as well, if that is what you prefer. Your flow will look like this (same for both before and after save flow):

I recommend using the update element for all record-triggered flows. If you need to change your flow from before-save to after-save at some point, you can easily do that.
Share this:

Published by gatortail
View all posts by gatortail
7 thoughts on “Update or Assignment Element in Before Save Record-Triggered Salesforce Flows?”
If you would have an after save flow with multiple outcome orders in a decision element. Let’s say 3 of them. And you need to create a new record. Would you then use 3 times a create record element (for every outcome) ? or would you use 3 assignment elements that will all connect to 1 create record element?
I personally prefer formula + assignment is that’s possible. However from a performance standpoint, I don’t think it matters because you won’t ever do more than one create in any run even if you have let’s say three create elements. Your decision criteria should be mutually exclusive to ensure that. Great question. Thanks.
Hi Engin, Thanks so much for this post! I noticed the change, and hadn’t seen any information about it from Salesforce, so I was confused.
I had a follow-up question. There are times when I have several decision elements in an After Save flow, and so will need to possibly update several fields on the same record. Would it be more performant to use Assignment elements tied to each node, and do an Update Record at the end, or is it OK to use multiple Update Records elements?
I wasn’t sure if there was intelligence in the flow engine to only update the one record once, or if it actually performed multiple updates. Thanks for your advice.
When we are working in an after-save flow your update element is a DML operation. From a performance and governor limit standpoint, it makes sense to do less updates. However, if you don’t have a flow that’s not very big and you have update elements behind mutually exclusive decision outcome conditions, I don’t think it matters. In other words, if you have 5 update elements in your flow, and in any scenario you have one or two executing you should be fine. In a before-save flow, the update element is an assignment element under the hood. So you can be less careful, it will not carry out a DML operation. I hope this answers your question.
I think assignment impact is negligable. And if you are only going down one of the update paths in one unique run you should be fine with multiple updates. If your flow is getting really big then one update is better I think.
Thanks for sharing the information. Do you know if there is any difference in performance?
There cannot be a performance difference in before-save flows because a DML update is technically not possible. The update element in before-save is a mere shortcut to an assignment under the hood. Same thing.
Leave a Reply Cancel reply
- Already have a WordPress.com account? Log in now.
- Subscribe Subscribed
- Copy shortlink
- Report this content
- View post in Reader
- Manage subscriptions
- Collapse this bar
- AppAssessor
Articles by role:
- Consultants
- Business Analysts
By Lucy Mazalon
By Ben McCarthy
- Courses Login
What’s trending
An Admin’s Guide to Salesforce SOQL + Examples
50 Most Popular Salesforce Interview Questions & Answers
30 Salesforce Admin Interview Questions & Answers
Top 10 Salesforce Ecosystem Trends in 2024: The Good, the Bad, and the Ugly
30 Salesforce Developer Interview Questions & Answers
UPCOMING EVENTS
How to deploy salesforce flows like a pro, forcelandia.
Portland, USA
From Bottlenecks to Benchmarks
Ready for salesforce data cloud key data quality facts you need to know, sales cloud implementation success: lessons from the field, the complete guide to salesforce flow.
By Tim Combridge
The use cases for Flow are endless, and its capabilities are growing with every Salesforce release. Formerly Visual Flow, Salesforce Flow has gone through significant upgrades to give us the Flow Builder interface, after being completely rebuilt from the ground up!
What are Salesforce Flows?

What Are the Basic Flow Features?
Manager tab.

- Variables are where you can store data to use in the Flow. These can be Text, Number, Record, Dates, Currency, Boolean, or Picklists just to name a few.
- Collections are a group, or ‘list’, of Variables stored together. Collections allow you to process multiple records at once, or ‘bulkify’ your Flows.
- Constants are values you set once and never change. They are useful when you want to refer to a single value multiple times through your Flow – if you ever need to change that value, you just need to change it once and it is reflected throughout the Flow.
- Formulae display a dynamic value depending on other values within your Flow. If you need to calculate a future date based on when the Flow was run, a Formula will be helpful. If you need to calculate and set a currency based on an interest rate, a Formula can be used.
- Choices are used within Screen Elements to display an option to the user.
Elements – Interaction, Logic, Data Elements

- A Screen element, only available in a Screen Flow, allows you to present a screen to the user. This screen can display information from the data your Flow is working on, or it can be used to collect information from the user.
- An Action element allows you to pass data through to a pre-existing standard or custom action such as Send Email, a Quick Create, or a custom Apex action.
- A Subflow element allows you to call another Flow within your current Flow – this means that if you have another complex Flow set up, you don’t need to replicate the logic in your new Flow. This also makes maintenance easier as you only need to update your logic once if you design your Flows well enough!
- Decisions allow you to split your Flow depending on the data that’s being sent through it.
- Assignments allow you to give a value to a variable.
- Loops allow you to handle multiple variables at once using collections.
How Do You Call a Flow in Salesforce?

- A Screen Flow is called through a button or action, or displayed in a Lightning Page or the Utility Bar, and appears as a screen to the user to interact with. This cannot be automatically called.
- A Schedule-Triggered Flow runs automatically to a recurring schedule. This is handy for tasks that need to be performed daily on a set of records, or to handle jobs that run frequently.
- Autolaunched Flows are called through Apex, Process Builder, or another Flow. They can be used to perform actions automatically behind the scenes.
- Record-Triggered Flows begin when a record is created or updated, very similar to Process Builder (more on this later).
- Platform Event-Triggered Flows are called when a platform event is received, similar to an Autolaunched Flow.
Can Flows Be the ‘One Tool to Rule Them All’?
Tim combridge.

More like this:
What is the uk salesforce ai centre.
By Lauren Westwood
You Know More Than You Think: From IT Specialist to Technology Leader
By Peter Chittum
Sending Emails With Apex: setTargetObjectId() vs. setToAddresses()
By Anand Dosapati
Leave a Reply Cancel reply
Save my name and email in this browser for the next time I comment.
JORDAN NELSON
- Jul 27, 2020
Salesforce Flow Assignments
Updated: Dec 25, 2021
What Does This Post Cover?
- How to use the Assignment Element in Salesforce Flows
- Have you ever needed to assign a new value to an existing variable? YES?! Great - this use case was made just for you.
In this example:
We will be taking the assignment element and setting a new value (assigning) to an existing variable. Our made up business use case is the following: The account management team needs to be able to update the account with the client's favorite movie when needed. Create a solution that will allow the AM team to do this.
Since we have a video on this showing you step by step, this blog post will be primarily used to view the values we used in the video as a reference to rebuild.
#1 Account Button

#2 Assignment Flow
a. Get Records: "Find Account Info"

b. Screen: Screen1

c. Assignment: Assign New Values?

d.Update Records: Update Account

#3 Video Walkthrough
Check out the FULL video walkthrough to get more context here in the youtube video below 🎬🍿
CLICK TO WATCH VIDEO

Recent Posts
How to clean up your Salesforce
Salesforce Naming Conventions
How to Apply Case Assignment Rules in Flow
May 18, 2023 Yumi Ibrahimzade Actions , Automation , Flow , Flow Actions , Flow Packages , Packages 28

The case object is a core part of the Salesforce platform. It helps manage and track customer issues and inquiries. You can use this standard object to handle support requests effectively. The case object acts as a central repository for recording and monitoring customer interactions. It allows you to streamline your customer service processes. In order to improve the support efficiency, it is important to assign cases to the right teams or individuals. Although you can manually assign the record, it is possible to use the standard case assignment rules as well. Case assignment rules determine how cases are assigned to users or put into queues.
When you create a new case record, you can just mark "Assign using active assignment rule" to run case assignment rules.

However, if you are creating the case record using Salesforce Flow, there is no standard option to run the case assignment rules. This option exists just for lead assignment rules. Moreover, when you create a case using flow, you have to set the correct owner id. Otherwise, the system doesn't run the case assignment rules and assigns the case to the current user. If you really want to use the logic that you have in your assignment rule, you will have to build the same logic again in the flow.

In this post, you can find a custom invocable action (Apex class) that runs case assignment rules for any case record that you want.
How to Use the Action
1- Install the action using the installation links below.
2- Add a new action to your flow and search for "Apply Case Assignment Rules", this is the name of the action that you installed.

3- Give a name to the action and provide the id of the case record that you want to assign.

You can use this action in any flow type that supports the action element.
Here is a screen flow that clones a case record with its related records. It uses this custom action to assign the new case record. Read this post to learn how to create a flow to clone a record with its related records.
Installation Links
Use this link to install in production or developer edition environments.
Use this link to install in sandbox environments.
27 Comments
Is that a future method or synchronous?
It is synchronous.
Hi Yumi, I tried using this on a case after save flow as an immediate action on create and it doesn't work. However, if I add a scheduled path of 0 min after creation, it works. Do you know of this limitation? Thanks!
I'm also noticing that this doesn't work when a guest executes a screen flow from a public page which creates the case.
Is your screen flow working in system context - view all data?
Hi Jay, It works in asynchronous path as well. I will check if it is possible to use it in the immediate path.
Thank you, I don't have to code this now.
You are welcome!
Hey Yumi, Case is assigned but email is not fired to members of queue? Any suggestions?
Hi Priyanshu, You are right. I just added it to the code and uploaded the package again. Can you please try with the new version?
Thanks Yumi, Can you please provide the url for new version?
Yumi, waiting for your response.
Is there a way to verify (in a flow decision), using a formula or some other way, if the "Assign using active assignment rule" is checked? I have a user case where the Assignment rules need to be triggered within the flow ONLY when the checkbox "Assign using active assignment rule" is checked, but I cannot find a way to do so. Any ideas?
"Assign using active assignment rule" is not a field on the object, so I think unfortunately it is not possible to get this information.
Hey Yumi Ibrahimzade, Not working in production or can you please provide url for update version? Thanks in advance 🙂
Thank you so much for this package. I just came across the need for this and then found your solution. It works exactly as expected.
I am glad that you found it useful!
Thanks Yumi, It helped me a lot to resolve my issue!
I am glad that you liked it Nadia!
Thanks for the post, Yumi, would you be willing to publish the code in a code snippet?
You are welcome Andy. Here is the code:
public class ApplyCaseAssignmentRules { @InvocableMethod (label='Apply Case Assignment Rules') public static void CaseAssign(List CaseId) { Database.DMLOptions dmo = new Database.DMLOptions(); dmo.assignmentRuleHeader.useDefaultRule= true; dmo.EmailHeader.TriggerUserEmail = true; Case Cases=[Select id From Case Where Case.id in:CaseId]; Cases.setOptions(dmo); update Cases; } }
I am using this action in a trigger flow (After Save), but it's not working, I should a scheduled path if I wanted to work, any suggestions please ? Thank you
Hi, You should use this action in a scheduled or asynchronous path.
I am trying to install in sandbox and getting this error: ApplyCaseAssignmentRulesTest: Method does not exist or incorrect signature: void startTest() from the type Test
Worked perfect in a screen flow with no Scheduled or Asynchronous path.. Thanks!
Hi Yumi! We have installed the packaged and worked perfectly well in a flow that creates cases. Thank you so much for this. We are facing another situation: we have a flow that reopens a case and we need to go through assigment rules again only when the case user owner is not active. We added the apex code to the flow but it didn´t work in this scenario. Does it trigger only for new cases? Is it possible to use it for updated cases? Can you help? Thank you in advanced.
It works on update too, can you try to run this action in async path?
1 Trackback / Pingback
- Integrating ChatGPT with Salesforce: A Real-Life Example
Leave a Reply Cancel reply
Your email address will not be published.
Save my name, email, and website in this browser for the next time I comment.
Copyright © 2024 | SalesforceTime.com
- Manage Email Subscriptions
- How to Post to DZone
- Article Submission Guidelines
- Manage My Drafts
Low-Code Development: Leverage low and no code to streamline your workflow so that you can focus on higher priorities.
DZone Security Research: Tell us your top security strategies in 2024, influence our research, and enter for a chance to win $!
Launch your software development career: Dive head first into the SDLC and learn how to build high-quality software and teams.
Open Source Migration Practices and Patterns : Explore key traits of migrating open-source software and its impact on software development.
- How To Plan a (Successful) MuleSoft VPN Migration (Part I)
- On-Demand-Schedulers With MuleSoft CloudHub APIs
- Understanding Mule Events in Mule 4
- Create Proxy Application for Mule APIs
- Query SQL and NoSQL Databases Using Artificial Intelligence
- Scrum Master Interview 2024
- How To Use Thread.sleep() in Selenium
- 5 Simple Steps To Get Your Test Suite Running in Heroku CI
- Software Design and Architecture
- Integration
Trigger Salesforce Assignment Rules and Send Notifications From MuleSoft
This blog describes the process of triggering salesforce lead or case assignment rules and sending email notifications to owners when creating records from mulesoft..
Join the DZone community and get the full member experience.
In many MuleSoft integration projects, there is a requirement to create lead or case records in Salesforce. Organizations typically use the lead assignment rule and case assignment rule to automatically assign new leads or cases to the users or queue.
When we create leads or cases from MuleSoft using the Salesforce connector, by default it does not trigger the assignment rules and does not send email notifications to owners.
This blog describes the process of triggering Salesforce lead or case assignment rules and sending email notifications to owners when creating records from MuleSoft. We will assume that the salesforce assignment rules are already set up and which get triggered when creating leads or cases from the salesforce UI. We will be focusing on triggering assignment rules in Salesforce when creating a new lead or case from Mulesoft. This blog will not cover how to create assignment rules in Salesforce.
Salesforce Assignment Rules
Assignment rules in Salesforce are used to automatically assign a lead or case to the owner (user or queue).
Salesforce provides two types of assignment rules:
- Lead assignment rule: This is used to specify how leads are assigned to users or queues.
- Case assignment rule: This is used to determine how cases are assigned to users or put into queues.
When a new lead or case is created it triggers the assignment rule as well as sends the notification email to the assignee if the send email checkbox is enabled. For example: In the below screenshot, you can see two lead assignment rules. One is default and the other is a custom rule (Mule Assignment Rule) created for this blog. Please note that at a time only one assignment rule can be active.

Mule Assignment Rule
In this rule, leads are assigned to the owners based on the condition for lead: country, and after that email notifications are sent to those owners as the send email checkbox is true.

To know more about the salesforce assignment rules you can refer here .
AssignmentRuleHeader
To trigger the assignment rule from MuleSoft, AssignmentRuleHeader must be specified in the salesforce connector for the specified assignment rule to be triggered. We can specify two types of AssignmentRuleHeader .
- useDefaultRule : This is a boolean type and it should be set to true. This triggers the default (active) assignment rule. If this is specified, do not specify an assignmentRuleId .
- assignmentRuleId : In this type, we can pass the ID of a specific assignment rule to run for the case or lead. The lead or case assignment rule can be active or inactive. The Assignment rule ID can be fetched by querying the AssignmentRule object. If this is specified, do not specify useDefaultRule .
EmailHeader : To send an email notification to the lead or case owner as a part of the assignment rule, EmailHeader with " triggerUserEmail '' type set to 'true' should be passed in the Salesforce connector.
Walkthrough
For the demo, we will be considering a use case where leads are created in Salesforce using MuleSoft. We will be using the previously mentioned ‘Mule Assignment Rule’ which assigns leads to owners based on the lead country value and sends email notifications.

Add a mule flow with the below connectors to create leads in Salesforce.

In the salesforceHeaders variable set the AssignmentRuleHeader and EmailHeader with the below syntax:
Here, we are using the useDefaultRule option which will trigger the default active lead assignment rule.
If your requirement is to trigger a specific assignment rule, we can specify the assignmentRuleId :
You can get the assignmentRuleId by running SOQL: SELECT id FROM AssignmentRule WHERE Name = 'Mule Assignment Rule'
Please note that we need to pass both the headers to trigger the assignment rule and send notifications. If the requirement is to only trigger the assignment and not send an email, you can skip the EmailHeader . But if email notification is needed you need to mandatorily add the EmailHeader else it will not send an email even if the send email checkbox is true in the assignment rule.
Add the Salesforce transformation in the Transform Message.
Please note that we are creating this lead with country = ‘US’ which will satisfy the first assignment rule condition and should assign this lead to ‘Mule Max’ .
Pass the salesforceHeaders variable in the headers section of the Salesforce connector.

Run the application and trigger the request.
- Lead Assigned: A lead is created in Salesforce and it is assigned to ‘Mule Max’ as per the lead assignment rule.

- Email Sent: Email is triggered to the lead owner as per the lead assignment rule.

Email format can be different based on the email template used in the salesforce assignment rule.
Note: If you are using the Salesforce Sandbox environment, it may not trigger the email notification because by default the send email access is disabled in Sandbox. To enable the send email access go to the email deliverability setting in the Salesforce setup and change the access level to All Email.

We have covered how to trigger the salesforce lead assignment rule and send email notifications to the lead owners when creating new leads from MuleSoft. The same process can be used for the case assignment rules.
Opinions expressed by DZone contributors are their own.
Partner Resources
- About DZone
- Send feedback
- Community research
- Advertise with DZone
CONTRIBUTE ON DZONE
- Become a Contributor
- Core Program
- Visit the Writers' Zone
- Terms of Service
- Privacy Policy
- 3343 Perimeter Hill Drive
- Nashville, TN 37211
- [email protected]
Let's be friends:
- App Building
- Be Release Ready – Summer ’24
- Integration
- Salesforce Well-Architected ↗
- See all products ↗
- Career Resources
- Essential Habits
- Salesforce Admin Skills Kit
- Salesforce Admin Enablement Kit
Home » Video » How I Created a Solution to Test Scheduled Flows Easier During UAT | Automate This!

- How I Created a Solution to Test Scheduled Flows Easier During UAT | Automate This!
Welcome to another “Automate This!” In this live-streamed video series, we cover all things automation, from use cases and best practices to showcasing solutions built by Awesome Admin Trailblazers like you. With automation, you can remove manual tasks, drive efficiency, and eliminate friction and redundancy. In this episode, let’s see how Nancy Brown created a screen flow and subflow to make user acceptance testing (UAT) of a scheduled flow easier for her clients.
Testing schedule-triggered flows is challenging
User acceptance testing (UAT) is a critical phase in any software development lifecycle. It's the final checkpoint before a system or feature goes live, ensuring that it meets business requirements and functions as expected. However, testing scheduled flows in Salesforce can be challenging. In this blog, we'll delve into a simplified solution based on a real-world production scenario and discuss a practical approach to streamline UAT for scheduled email reminders.
Imagine this scenario: Your client requests a solution to send Time Card reminder emails to employees at three different intervals based on the Week Ending Date. The challenge? Each reminder email is only sent out on specific calculated dates based on the Week Ending Date that comes from a tightly controlled Time Card Period object. Provided below is a screenshot of a sample Time Card record followed by a description of how the reminder fields are calculated.

- Submit Reminder: Sent 2 days before the Week Ending Date (always a Friday)
- Unsubmitted Reminder: Sent 2 days after the Week Ending Date (always a Tuesday)
- Beginning of the Month Reminder: Sent at the beginning of the next month based on the reporting week
Original solution: Three scheduled flows
To meet this requirement, I developed three separate scheduled flows that read Time Card records to determine if the date in the respective formula field matches the current date. If so, a specific reminder email is sent. I’m going to walk through the three main components of the original Submit Reminder Alert scheduled flow to review how the flows are configured.

1. Flow Scheduling — The flow is scheduled to run daily at the specific time that is established when the flow was initially configured via the ‘Set a Schedule’ window.

A few tips regarding scheduled flows:
- The start time is based on your organization's default time zone on the Company Information page (Setup > Company Information).
- Check the Setup > Scheduled Jobs to confirm that the displayed run time is correct.
- If a flow is scheduled to run one time with a date and time that already passed, the flow won’t run.
- It’s the Automated Process user who runs schedule-triggered flows.
2. Submit Reminder Date Decision Element — This shows the Decision element that checks if the Time Card record’s Submit Reminder formula field equals the current date.

3. Send Submit Reminder Email — When the Submit Reminder Date is equal to the current date, the Send Submit Reminder Email action shown below is executed.

A solution to overcome testing challenges
During UAT, testing scheduled flows with date-dependent processing becomes cumbersome, particularly when the testing window is short. Manipulating the referenced Week End Date that controls the formula fields could be employed but this would still require coordination with testers.
As a result, I needed to develop a process that allows testers to control which email reminders are sent based on their schedule and the desired email destination so the tester could confirm the contents of the email sent. To address the testing challenges, I extracted the email sending process from the scheduled flow, let’s call that the ‘parent’ flow, and placed it into a ‘child’ subflow. Let's explore this approach in detail.
Step 1: Create a subflow using the Save As - A New Flow option
In lieu of creating the subflow from scratch, I used the Save as - A New Flow option from the original scheduled flow to create the new subflow named Time Card - Email Subflow. Most importantly, I selected Autolaunched Flow (No Trigger) for the Type field under Advanced settings. This is useful if you originally invested a lot of time building a flow before deciding to make it a subflow. You will get errors that will need to be resolved. For example, the referenced $Record variable doesn’t exist and will need to be replaced. In spite of time spent resolving errors, using Save as - A New Flow can be a time saver — especially if the original flow has a lot of variables that would need to be created from scratch in a brand new flow.

Step 2: Create input variables in the subflow
Setting up input and output variables in the subflow is essential to sending and receiving data between the parent and child flows. Shown below are the input variables that need to be created in the new subflow. Values received in the varEmailAlert input variable from the parent flow are: ‘Reminder’, ‘Unsubmitted’, or ‘Beginning of the Month’.

The varTimeCard input variable will receive the Time Card record from the parent flow.

The varRecipient input variable will receive the email entered by the tester during UAT. This will be covered in the last step.

Step 3: Add a Decision element in the subflow
Next, the Decision elements were added to the subflow to control the processing path based on the varEmailAlert variable. Although not shown below, the respective email actions (one each for each type of email alert) mirrored the actions that were deleted from the original scheduled flows.

The Reminder to Submit Time Card outcome is set to varEmailAlert equals Reminder.

The Unsubmitted Time Card Notice outcome is set to varEmailAlert equals Unsubmitted.

The Beginning of the Month Reminder Outcome is set to varEmailAlert equals Beginning of the Month.

Step 4: Make updates to the parent flow
Now that the subflow is fully configured and activated, I delete the Send Email element from each original scheduled flow. Then, I add new subflow elements in all three flows.

Next, I select the name of the new subflow, then click Done . Note: If your flow does not display, check and make sure you activated the flow, otherwise it won’t show up.

Lastly, I need to set the input values to pass data from the parent flow to the child subflow. In the right panel shown in the example below, 'Reminder' is passed into the varEmailAlert field, and the $Record variable is passed into the varTimeCard field. This data will be used as input for the subflow, resulting in a 'Submit Reminder' email being sent.

Now it’s time to see the final part of the solution. Shown below is a Time Card record page where a test can be initiated by clicking the T est Email Alert button.

By the way, if you’re new to creating an action button, here are a few tips.
- Start from Object Manager in Setup, then select your desired object, which in my case was the Time Card object.
- Click Buttons, Links, and Actions .
- Click the New Action button located in the upper right.
- Choose Action Type = Flow.
- Choose the desired flow from the Flow pick list. NOTE: The flow must be Active or it will not appear in the picklist.
- Enter a Label = Test Email Alert.
- Save the Action.
Following is a screenshot of the configured action button.

- From Object Manager, go to the record page layout to add the action button. The screenshot below shows the Test Email Alert action button added to the Time Card record Lightning page.

Once the button is clicked, the following screen flow opens where the tester can select the email they want to send and the email they want the alert sent to.

Now, let’s check behind the scenes to see how the screen flow is configured in Flow Builder. Next, we will break down how the Time Card Email Alert Test Screen components are configured.

Here’s how the radio buttons are configured on the back end. When Reminder to Submit Time Card is selected, it populates ‘Reminder’ in the {!Email_Alert_Type} screen field that will later be passed to the subflow.

Notice that the Reminder to Submit Time Card radio button is configured by entering it as the Choice Label, but the Choice Value is what is passed to the subflow.

When the Email field on the screen is populated, the value is placed in the Email field.

Later, the Email value is set as an input value. Note that the field name passed is {!Email.value} not just Email.

The Test Time Card Email Alert subflow node is the last node in the screen flow. This is almost identical to the one described above in the scheduled flow. One addition is the Email value that is passed. This represents the email entered by the tester so they can control where the email is sent rather than the default employee email that is normally used.

Last but not least, this is a sample email a tester would receive.

Benefits of this UAT solution
Implementing this UAT workaround solution allows testers to control the timing of email formatting tests without relying on the scheduled flow's runtime. This does not replace end-to-end testing to confirm the scheduled flow runs as designed; it just adds a user-friendly option.
This approach has helped me incrementally configure and debug a solution during the build and makes the UAT process more manageable. So, anytime I work with scheduled flows, I always configure the main processing in a subflow, regardless of complexity.
- Salesforce Help: Schedule-Triggered Flow Considerations
- Trailhead: Autolaunched and Scheduled Flows
- Salesforce Help: Monitoring Scheduled Jobs
- Salesforce Help: Create a Quick Action for a Flow
Want to see more good stuff? Subscribe to our channel!
Nancy brown.
As a Senior Consultant at Coastal and an 11x Certified Salesforce Professional, Nancy focuses on understanding clients' needs to implement effective, practical solutions. She also co-leads the Salesforce Orlando WIT Group. Outside of work, she enjoys attending smooth jazz concerts and traveling the world.
Related Posts

Use a Custom Error Element and Flow to Prevent Record Deletion | Automate This!
By Jeff Susich | April 17, 2024
Welcome to another “Automate This!” In this live-streamed video series, we cover all things automation, from use cases and best practices to showcasing solutions built by Awesome Admin Trailblazers like you. With automation, you can remove manual tasks, drive efficiency, and eliminate friction and redundancy. In this episode, let’s see how Jeff Susich uses a […]

Level Up Your Approvals with Flows and the Custom Error Element | Automate This!
By Jon Chen | April 17, 2024
Welcome to another “Automate This!” In this live-streamed video series, we cover all things automation, from use cases and best practices to showcasing solutions built by Awesome Admin Trailblazers like you. With automation, you can remove manual tasks, drive efficiency, and eliminate friction and redundancy. In this episode, learn how Jon Chen designs a solution […]

Use Flows and Experience Cloud to Access Salesforce Scheduler | Automate This!
By Lynn Guyer | March 21, 2024
Welcome to another “Automate This!” In this live-streamed video series, we cover all things automation, from use cases and best practices to showcasing solutions built by Awesome Admin Trailblazers like you. With automation, you can remove manual tasks, drive efficiency, and eliminate friction and redundancy. In this episode, learn how Lynn Guyer requests support from […]
COMMENTS
Flow: How To Use "Assignment". Assignment is the equal sign of flow (As you see in the icon). If you want to change the value of your variables, you will have to do it through Assignments. Some important notes before we dive into the details of Assignments: 1. Assignment Cannot Update Data Directly. If you have read my introduction of flow ...
Choose Which Salesforce Flow Feature to Use. Equivalent Features in Flows and Workflow Rules. Browser Requirements. ... Add a Limit Repetitions Element to a Next Best Action Flow. ... Build a Strategy Flow Using Predefined Recommendations. Build Strategy Using On-the-Fly Recommendations. Strategy Builder Strategies.
In this Salesforce Flow tutorial we'll explain the Salesforce Flow Assignment Element in depth, showing examples of a flow assignments to set field values, u...
Decision Element. The Decision element is one of the most important elements in the Flow Builder, as it allows for the creation of multiple paths based on various criteria, allowing a single flow to output different results based on decision criteria. When creating a Decision element, set the name and criteria for one or more outcomes.
In part twenty of our Salesforce Flow Builder tutorial series we continue building our before save record-triggered flow on the task object. We use an assign...
A Loop is a Salesforce Flow element that is used to iterate through a number of items in a collection variable. There are three main components of a Loop: Collection Variable: This is the Collection you want to loop through - the Collection contains multiple Variables, each of which you want to either assess or action.
The Assignment element can also change existing variable data instead of fully replacing it. Combine Text. When the data type of a variable is text, you can select Add as the Assignment element's operator. The Add operator lets you add text to the end of the current value. The Set Shipping Address flow is working pretty well, but now Flo ...
This format is quite a common use case for both Loops and Assignment elements. The first Assignment in this example is used to assign field values to a record variable. The Task Subject, Description, Due Date, and WhatId (the current Opportunity record from the Loop) in the new Task variable are being set by the Assignment element.
Learn what are assignment, decisions, and loop in lightning flow. Lear how to create/use Assignments, decisions, and loop in lightning flows. The video cover...
Click to close the side panel.; Save the flow. Add an Assignment Element to the Not Selected Path. In the Not Selected path, hover over and click .; Scroll to the Logic section and select Assignment.; For Label, enter Set Address from Screen.; Click +Add Assignment four times, so you have a total of five rows.; Select these values in the assignment rows:
The Assignment element is used to add the item currently in the loop to this new collection. We use the collection to update all the records at once in the next step. I'll explain why. Connect Assignment 2 back to the Loop element. This tells the flow to restart the loop with the next record after these two Assignments.
An Assignment is a Flow element that allows you to set the value of a selected resource.. Official Docs. Flow Assignment Element; Operators in Flow Assignment Elements; Add Logic to Your Flow Additional Resources. How to use an Assignment (David Litton); Salesforce Flow Assignments (Jordan Nelson); Video: Wizard's Apprentice Visual Workflow Episode 5: Loops, Assignments, and Fast Elements ...
In my next step, I need to assign a value to the Division field of the current item in the loop. Here, I use the Assignment flow element to set the Division field to a specific value. In this example, we'll set the field to "Arts" by assigning it to the {!Loop_Through_Arts.Division__c} which is the variable for the current record in the loop.
Two main use cases are formulas in flow Assignment elements and formulas in the entry condition for record-triggered flows. We'll talk about both, explain how to use them, and cover the benefits and caveats as we build flows. Formulas in flow Assignment elements. As I mentioned, formulas in Flow are created like any variable. They have an API ...
Let's explore and understand how to use some key Flow elements—Loop, Decision, Assignment, Get Records, Create Records, and Update Records. Loop The Loop element in Salesforce Flow allows you to iterate over a collection of records or execute a set of actions repeatedly until a certain condition is met. Decision The Decision element lets you
June 9, 2021 gatortail. You can now use update elements in Record-Triggered flows to update the field values that triggered the flow regardless of whether that flow is set to run before-save or after-save. Before Summer '21, you had to use the assignment element to update these field values in a before-save situation.
There are 3 main "building blocks" of any Flow: 1. Elements are the individual building blocks of the Flow. These perform logical actions such as assignments, decisions, or loops. There are also data elements that will query the database or commit record changes. 2. Connectors determine which element leads to which.
In this example: We will be taking the assignment element and setting a new value (assigning) to an existing variable. Our made up business use case is the following: The account management team needs to be able to update the account with the client's favorite movie when needed. Create a solution that will allow the AM team to do this.
http://studysalesforce.com/ [Find all Salesforce Video links]Udemy : Enroll Salesforce Admin Certification Masterclass : https://kadge.io/admin201Udemy : Enr...
When using the assignment element, operators depend on the type of the variable. For instance, if it is a text variable, only "Equals" and "Add" operators are available. On the other hand, if it is a collection variable, you will see more operator options. There are many assignment operators that you can use with collection variables.
To do so, select "Choose fields and assign variables (advanced)" option and then select the collection variable that you want to use. When Flow Builder creates a collection for you, it gives a name to the collection in a specific format; Object Name (s) from API Name of the Get Records action. For example, if you have a Get Records action to ...
Then, I added a second Assignment element on the loop path that takes the record in the current loop variable and adds it to the "cobj_CampaignMember_Update" collection variable. We'll use the same variable in an Update element after the Loop is completed. ... Flow Element: Loop; Salesforce Help: Sample Flow That Loops Through a ...
1- Install the action using the installation links below. 2- Add a new action to your flow and search for "Apply Case Assignment Rules", this is the name of the action that you installed. 3- Give a name to the action and provide the id of the case record that you want to assign. You can use this action in any flow type that supports the action ...
Add a mule flow with the below connectors to create leads in Salesforce. Step 2 In the salesforceHeaders variable set the AssignmentRuleHeader and EmailHeader with the below syntax:
If a flow is scheduled to run one time with a date and time that already passed, the flow won't run. It's the Automated Process user who runs schedule-triggered flows. 2. Submit Reminder Date Decision Element — This shows the Decision element that checks if the Time Card record's Submit Reminder formula field equals the current date. 3.